
Convert HEIC to JPG from Windows Context Menu
I got tired of manually converting iPhone HEIC photos to JPG, so I wrote a PowerShell script that adds this functionality right to Windows Explorer’s “Send to” menu. Here’s how to set it up in just a few minutes.
What You’ll Get
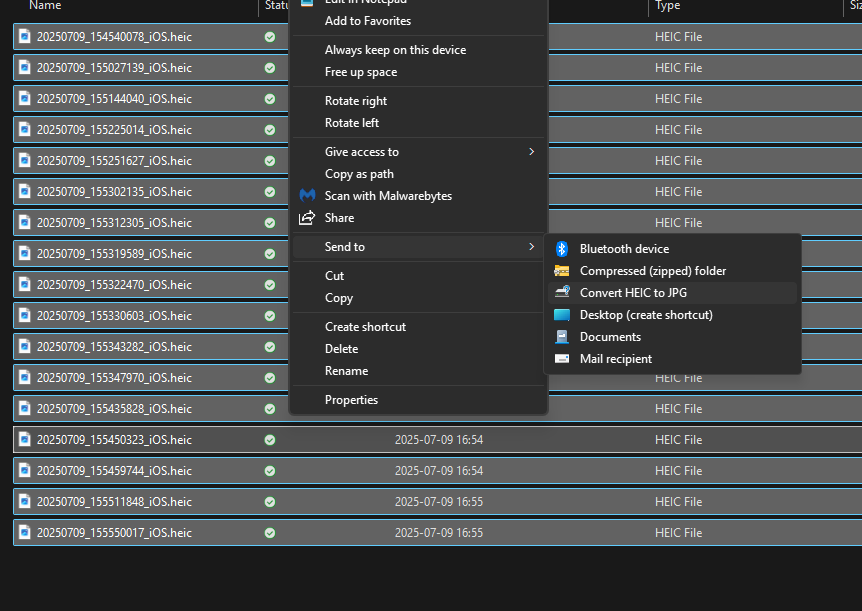
- Right-click any HEIC files → Send to → “Convert HEIC to JPG”
- Batch convert multiple files at once
- Automatic parallel processing (if using PowerShell 7+)
- Smart skipping of files that already have JPG versions
- Clear summary of what was converted
Prerequisites
1. Install ImageMagick
ImageMagick does the actual conversion work. Install it with winget:
winget install ImageMagick.Q8
This installs the Q8 version which is perfect for HEIC→JPG conversion (faster and uses less memory than Q16).
After installation, you may need to restart your command prompt or reboot to ensure ImageMagick is in your PATH.
2. Verify ImageMagick Works
Test that ImageMagick is properly installed:
magick -version
You should see version information. Also check for HEIC support:
magick -list format | Select-String "HEIC"
You should see something like HEIC r-- High Efficiency Image Format.
Install the Script
1. Download the Script
The script is available as a GitHub Gist. Open PowerShell and download the script from GitHub:
# Create a scripts directory
New-Item -Path "$env:USERPROFILE\Scripts" -ItemType Directory -Force

# Download the script
$scriptUrl = "https://gist.githubusercontent.com/dadatuputi/5a7e11e75446cda65420bb17a3c9bcd5/raw/e5fffa77de067d334227ca40bbd8fa0612979280/heic-to-jpg.ps1"
$scriptPath = "$env:USERPROFILE\Scripts\Convert-HEIC-to-JPG.ps1"
Invoke-WebRequest -Uri $scriptUrl -OutFile $scriptPath

# Navigate to the script location
Set-Location "$env:USERPROFILE\Scripts"
2. Install to Send To Menu
Run the script with the install flag:
.\Convert-HEIC-to-JPG.ps1 -Install
The script will:
- Verify ImageMagick is working
- Check for HEIC support
- Create a shortcut in your Send To menu
- Automatically detect PowerShell 7+ for better performance
If everything looks good, you’ll see:
✓ ImageMagick found: C:\Users\...\magick.exe
✓ ImageMagick working: Version: ImageMagick 7.1.1-47 Q8...
✓ HEIC support detected
✓ Shortcut created in Send To menu!
Usage
Convert HEIC Files
- Select HEIC files in File Explorer (one or multiple)
- Right-click and choose “Send to”
- Click “Convert HEIC to JPG”
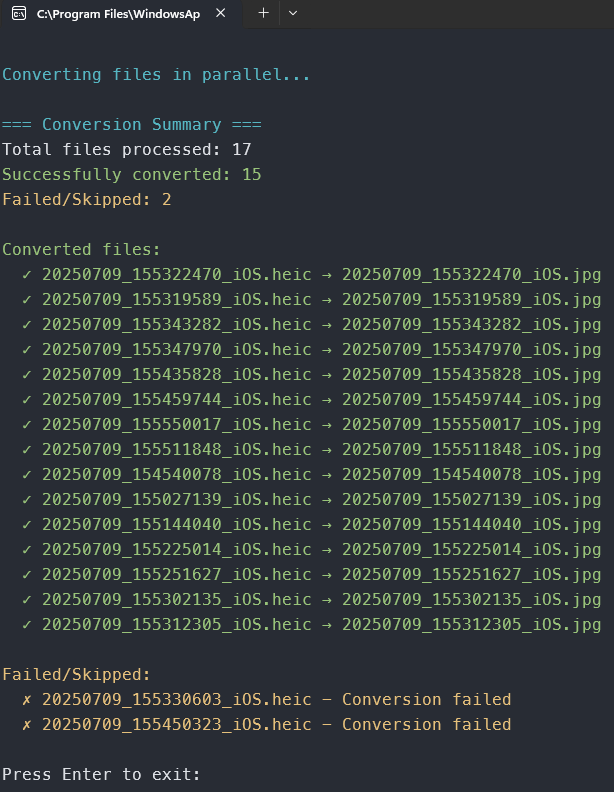
A PowerShell window will open showing the conversion progress:
Found 3 HEIC file(s) to convert

Converting files in parallel...
Converting: IMG_1234.heic
  → Success: IMG_1234.jpg
Converting: IMG_5678.heic
  → Success: IMG_5678.jpg
Converting: IMG_9012.heic
  → Skipping (JPG already exists)

=== Conversion Summary ===
Total files processed: 3
Successfully converted: 2
Failed/Skipped: 1

Converted files:
  ✓ IMG_1234.heic → IMG_1234.jpg
  ✓ IMG_5678.heic → IMG_5678.jpg

Failed/Skipped:
  ✗ IMG_9012.heic - Already exists
Performance Notes
- PowerShell 7+: Files convert in parallel for much faster batch processing
- Windows PowerShell 5.1: Files convert sequentially (still works fine)
- Smart skipping: Won’t overwrite existing JPG files
Uninstall
To remove the Send To menu item:
.\Convert-HEIC-to-JPG.ps1 -Uninstall
Troubleshooting
“ImageMagick not found”: Make sure ImageMagick is installed and in your PATH. Try restarting your command prompt.
“HEIC support not detected”: Some ImageMagick builds don’t include HEIC support. Try installing a different version:
winget install ImageMagick.Q16-HDRI
PowerShell execution policy errors: Run this once as Administrator:
Set-ExecutionPolicy -ExecutionPolicy RemoteSigned -Scope CurrentUser
Why This Approach?
I tried several methods:
- Context menu registry entries - Works but slow and converts each image one-by-one unless you compile a COM server
- Direct ImageMagick calls - Fast but no error handling or progress feedback
- Send To menu - Good balance of simplicity and functionality
The Send To approach is clean, reliable, and gives you nice progress feedback without any registry manipulation.
Script Features
The PowerShell script includes several nice touches:
- Self-installing: Just run with
-Installflag - PowerShell version detection: Automatically uses parallel processing if PowerShell 7+ is available
- Comprehensive error checking: Validates ImageMagick installation and HEIC support before installing
- Smart file handling: Only processes actual HEIC files and skips existing conversions
- Clean uninstall: Removes the Send To shortcut completely
The script is compatible with both Windows PowerShell 5.1 and PowerShell 7+, with better performance in the latter due to parallel processing support.
This script works on Windows 10/11 with both Windows PowerShell 5.1 and PowerShell 7+. The parallel processing feature requires PowerShell 7+ but everything else works fine in 5.1.